


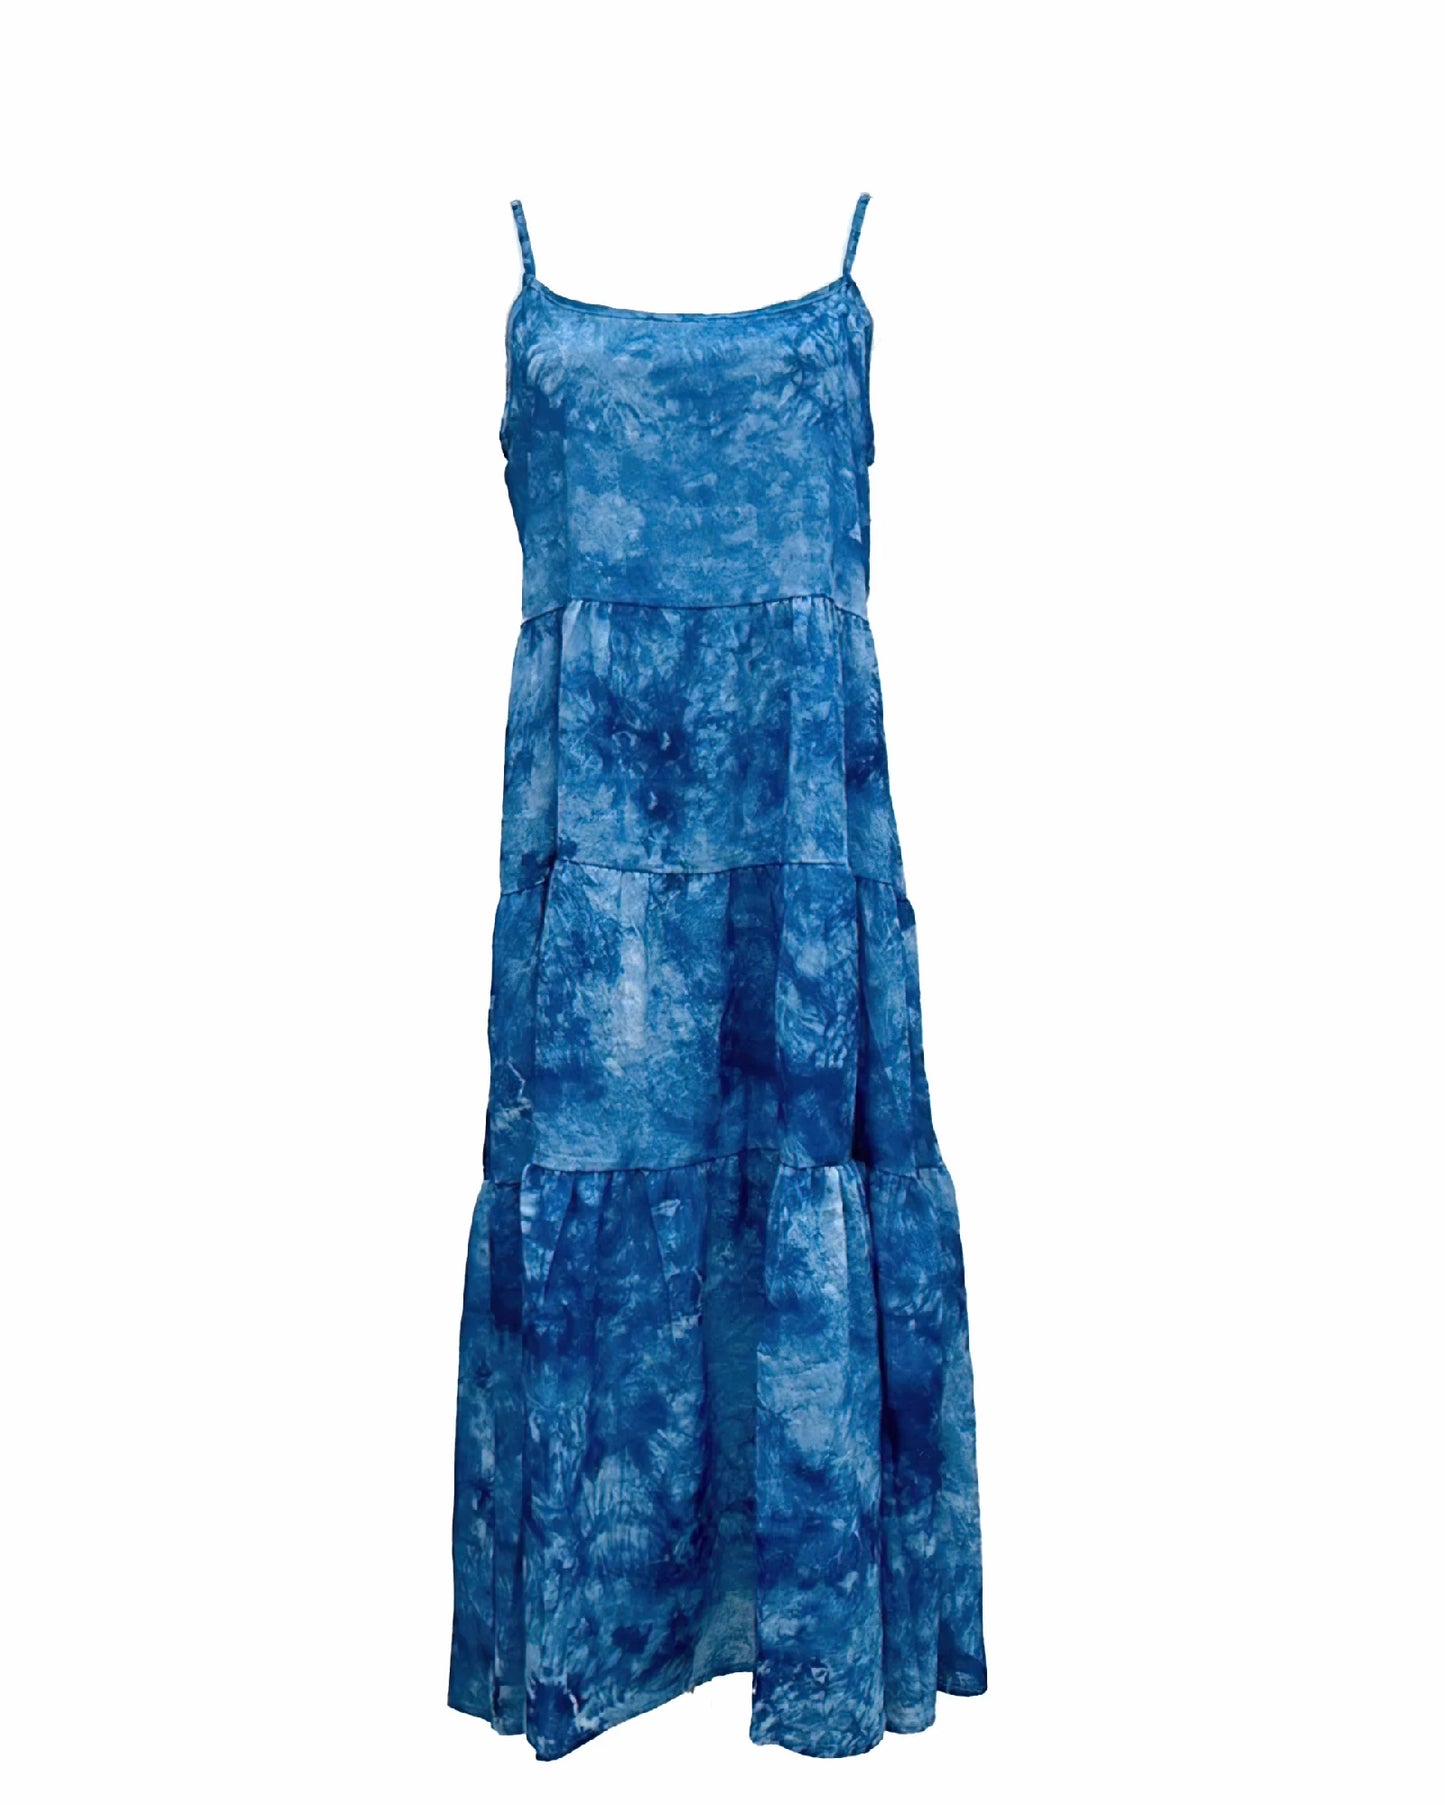
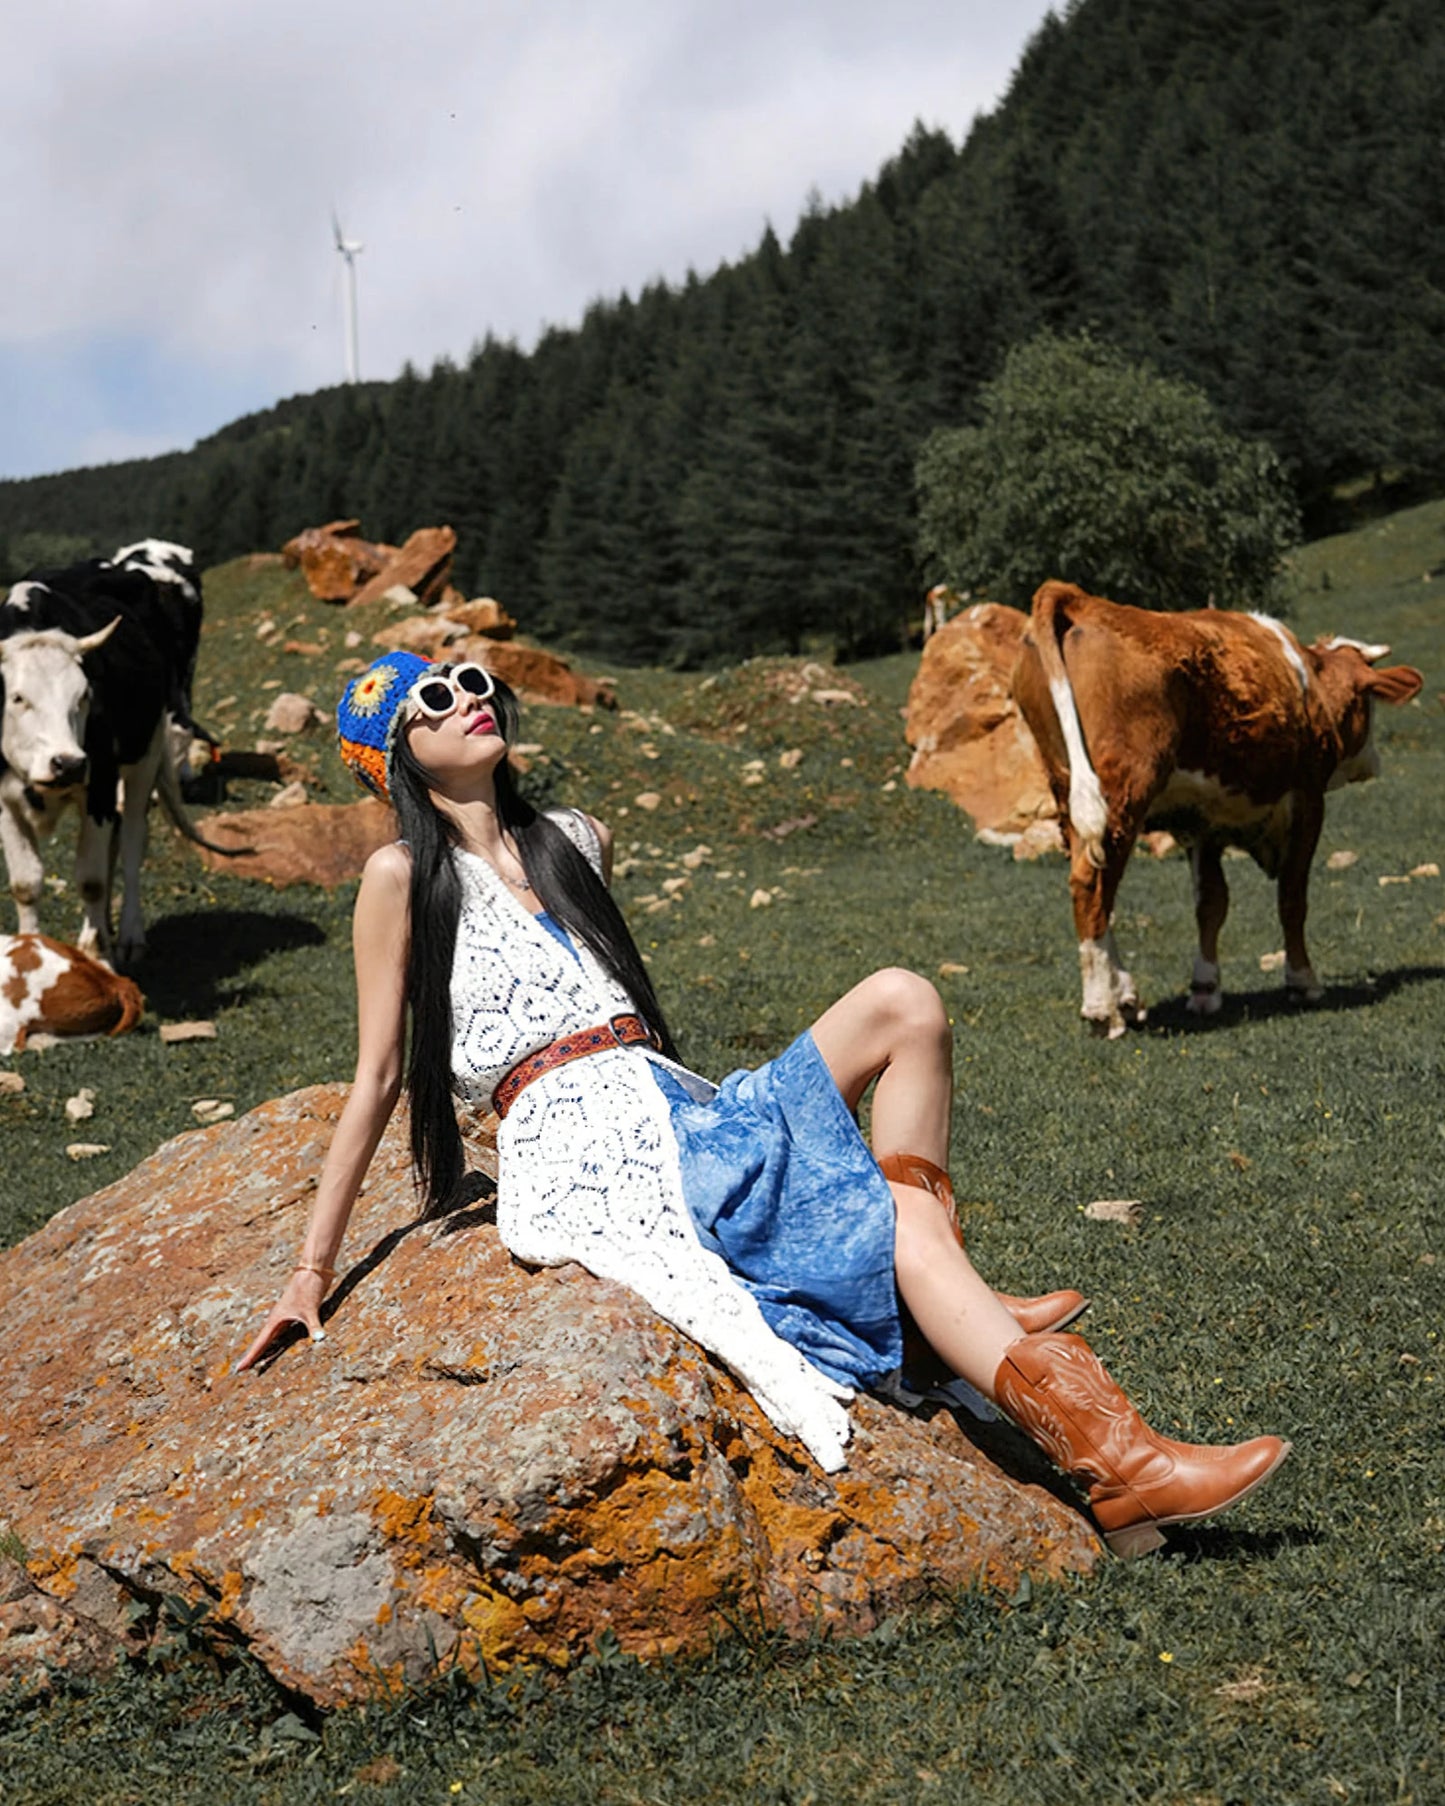
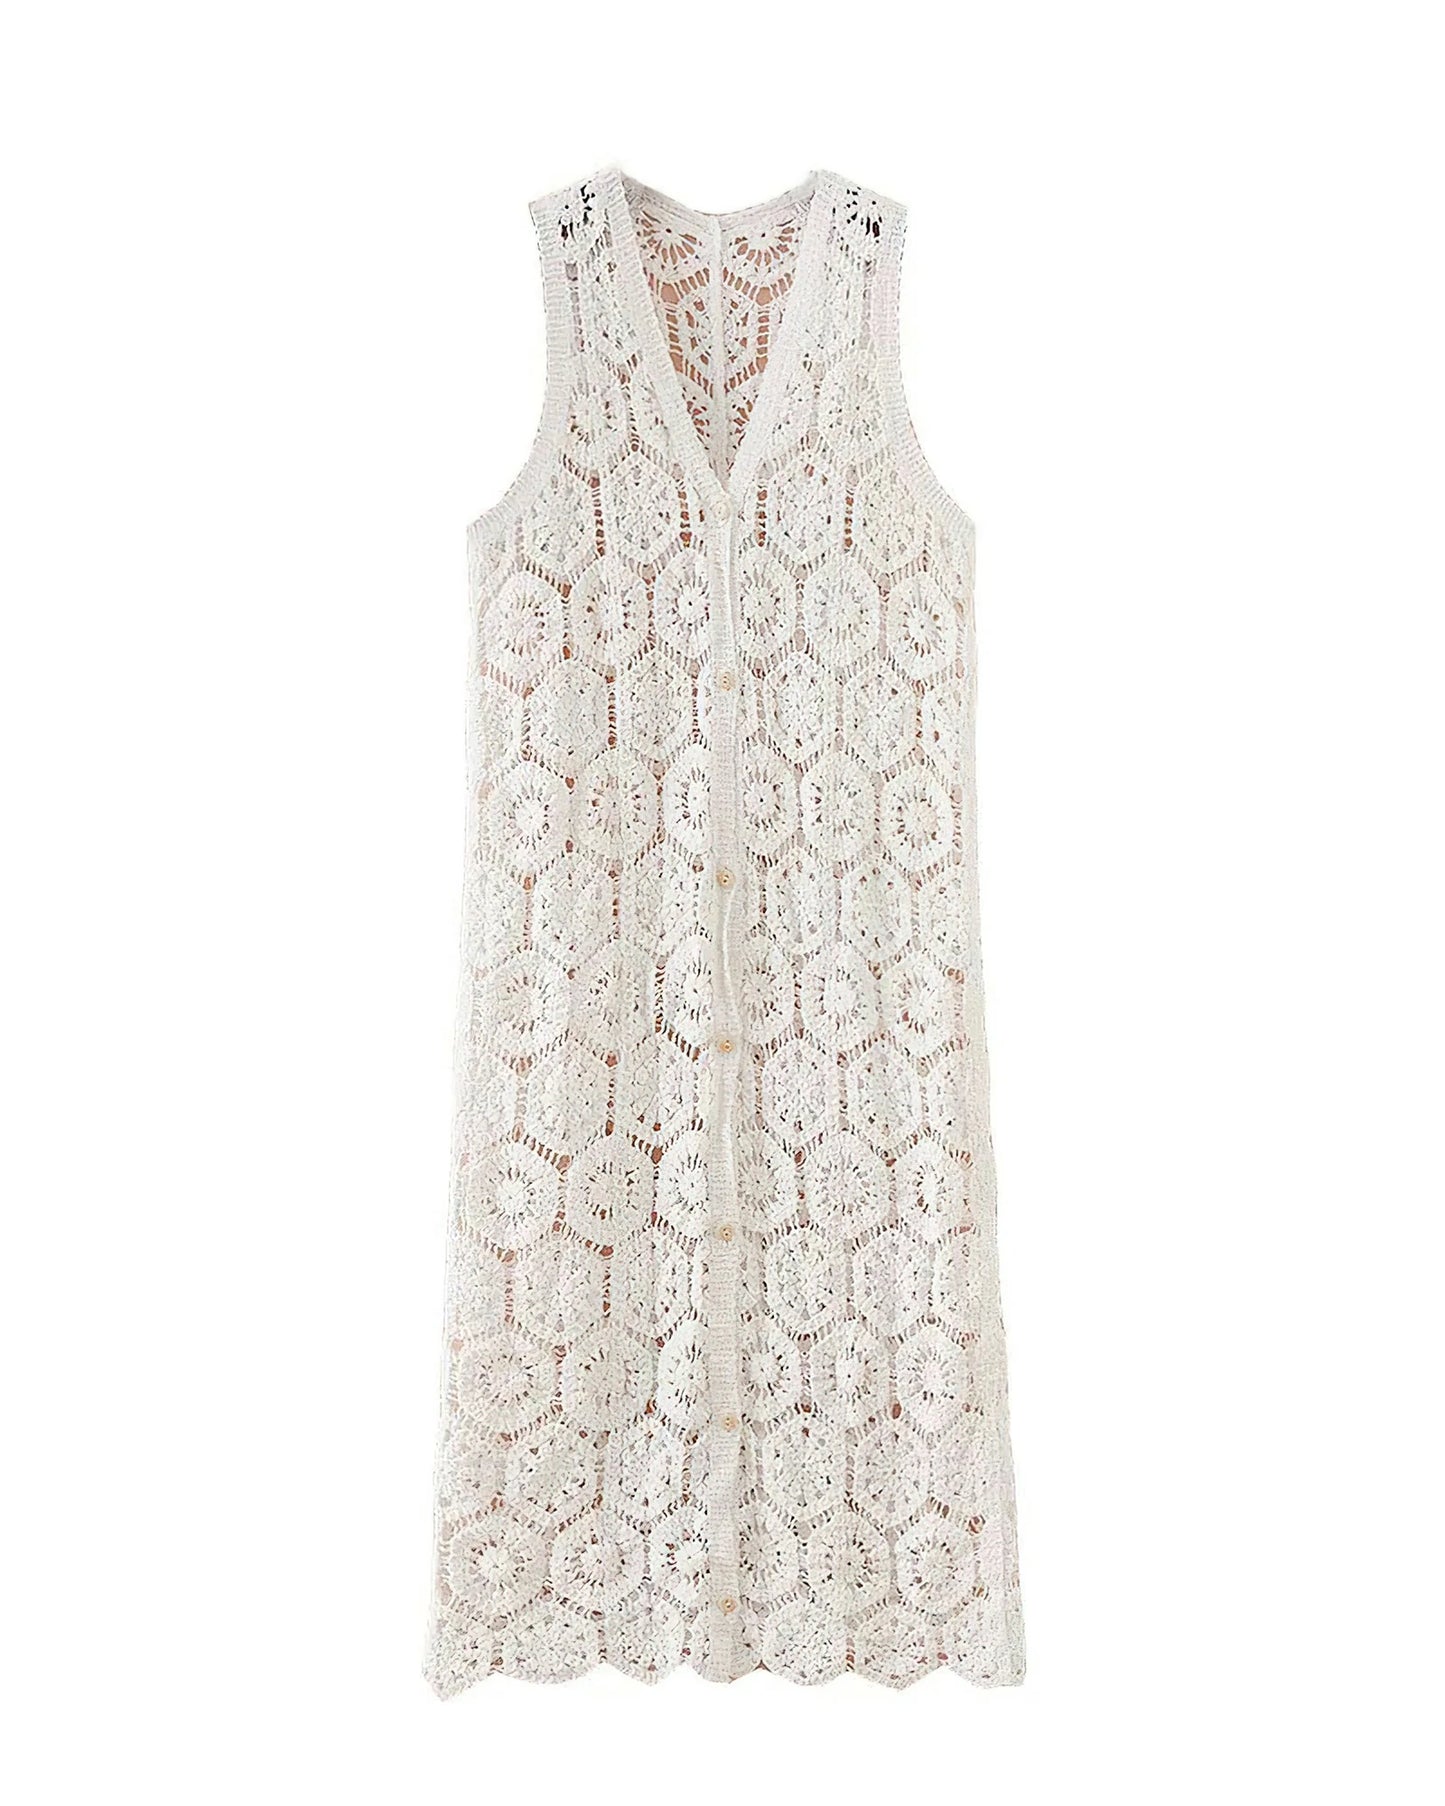
Mystic Waves Boho Tie-Dye Maxi Dress
Mystic Waves Boho Tie-Dye Maxi Dress
受取状況を読み込めませんでした

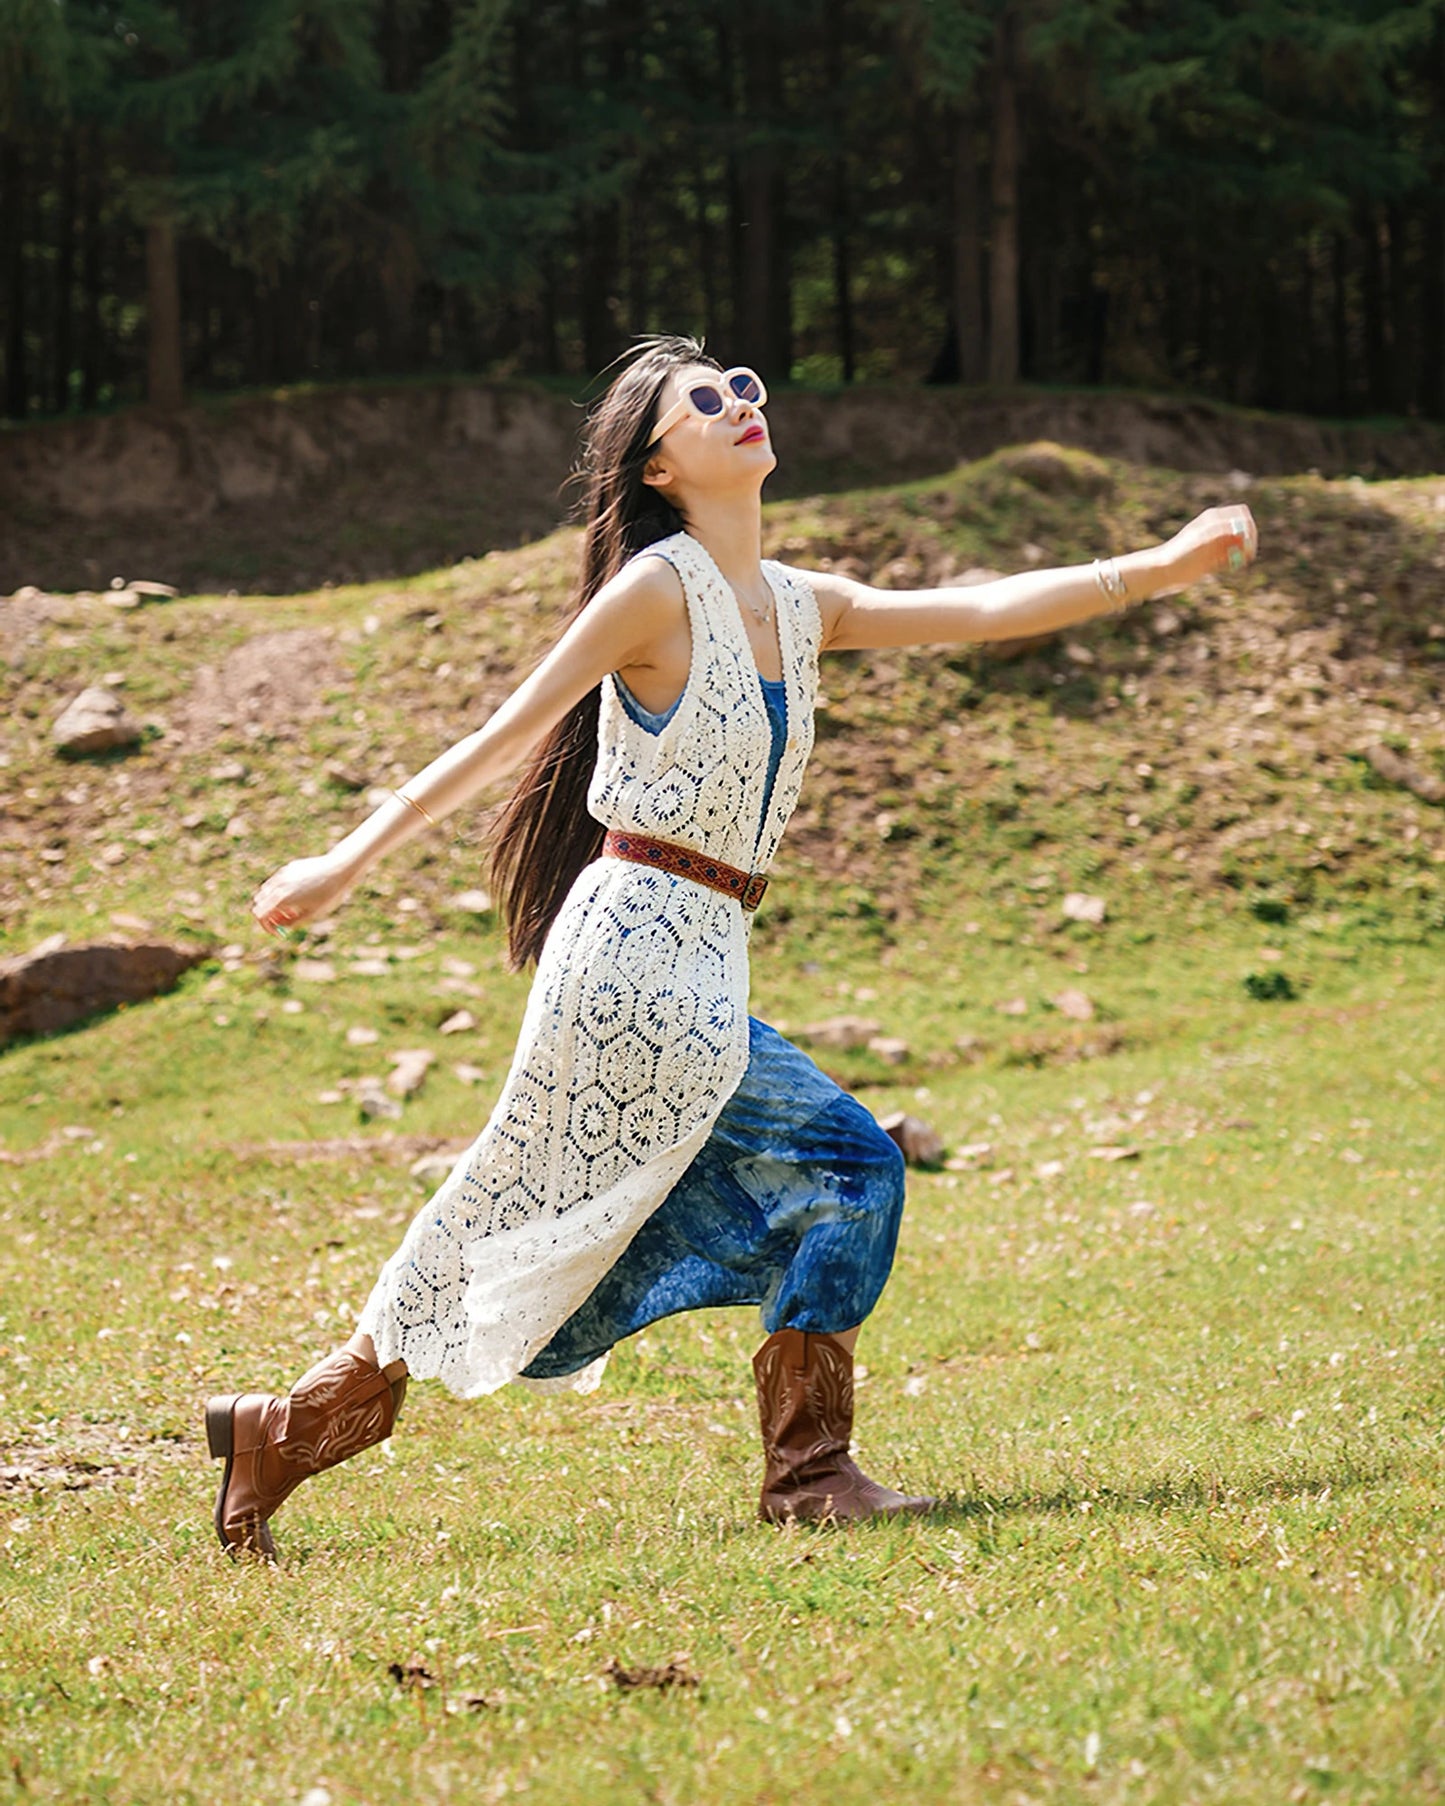
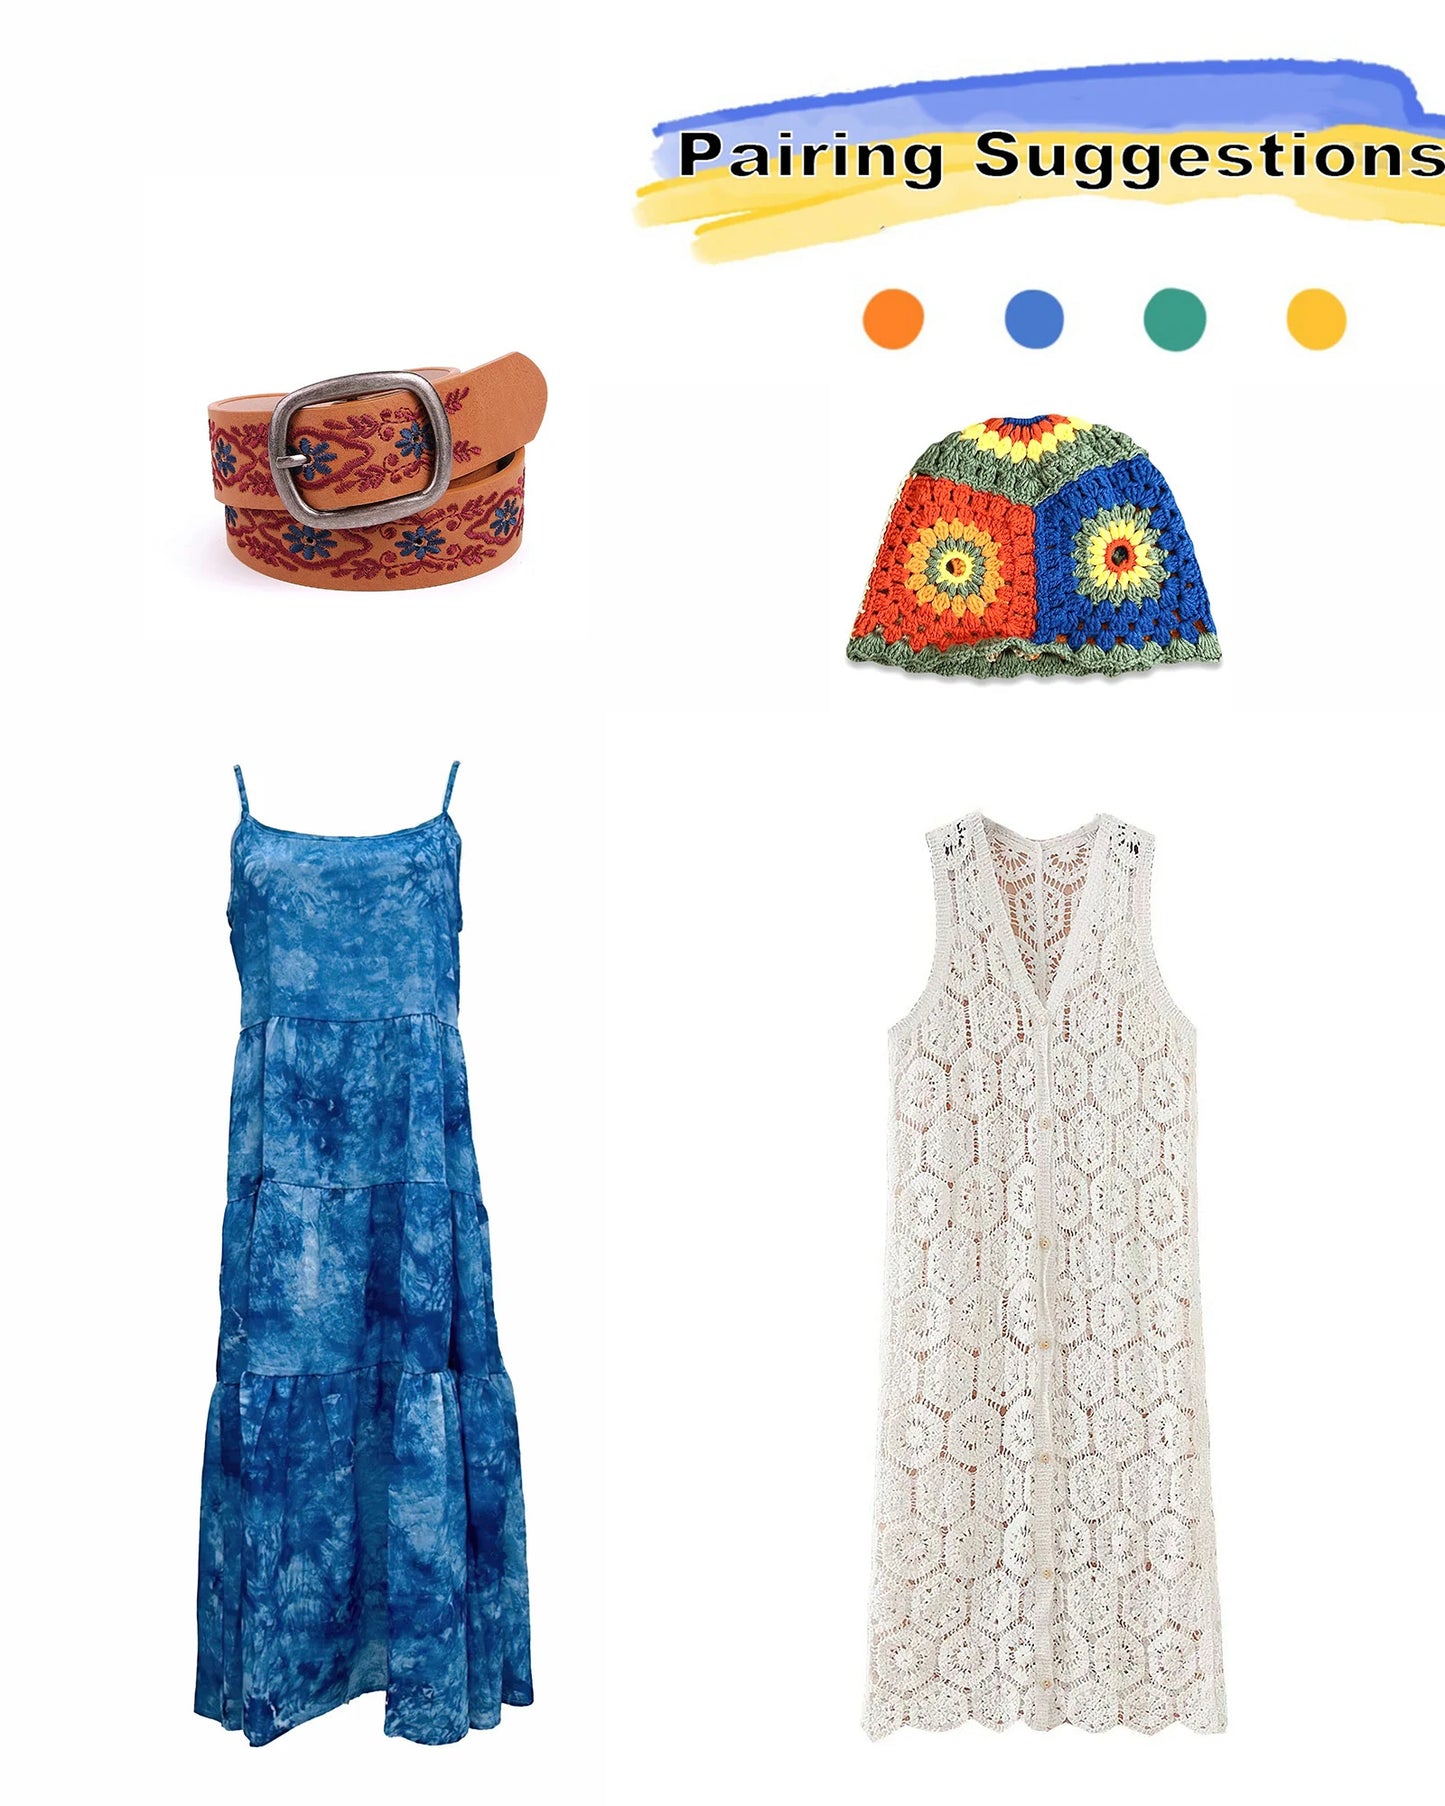
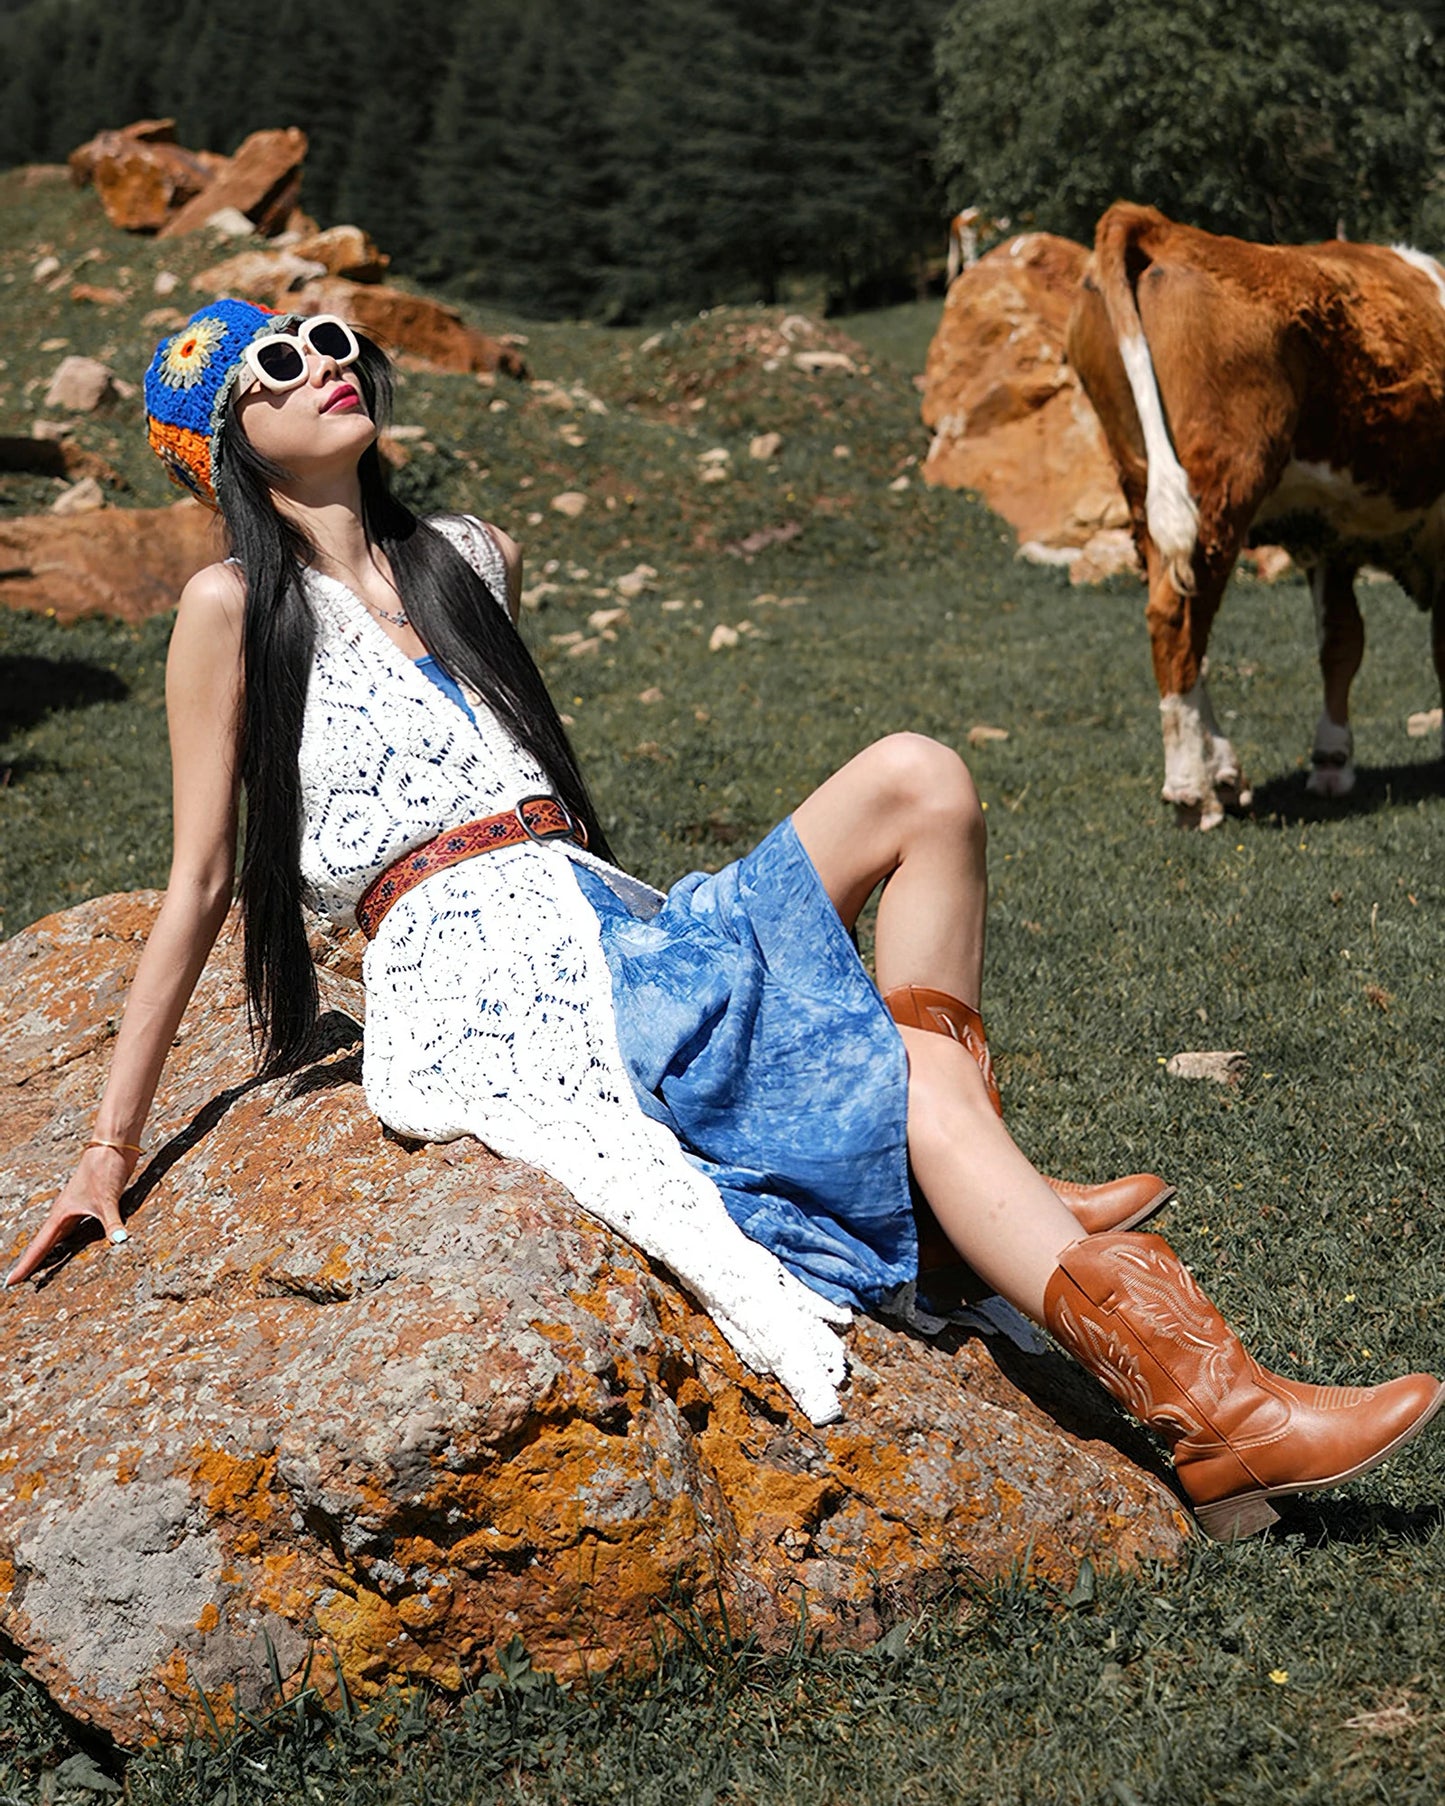
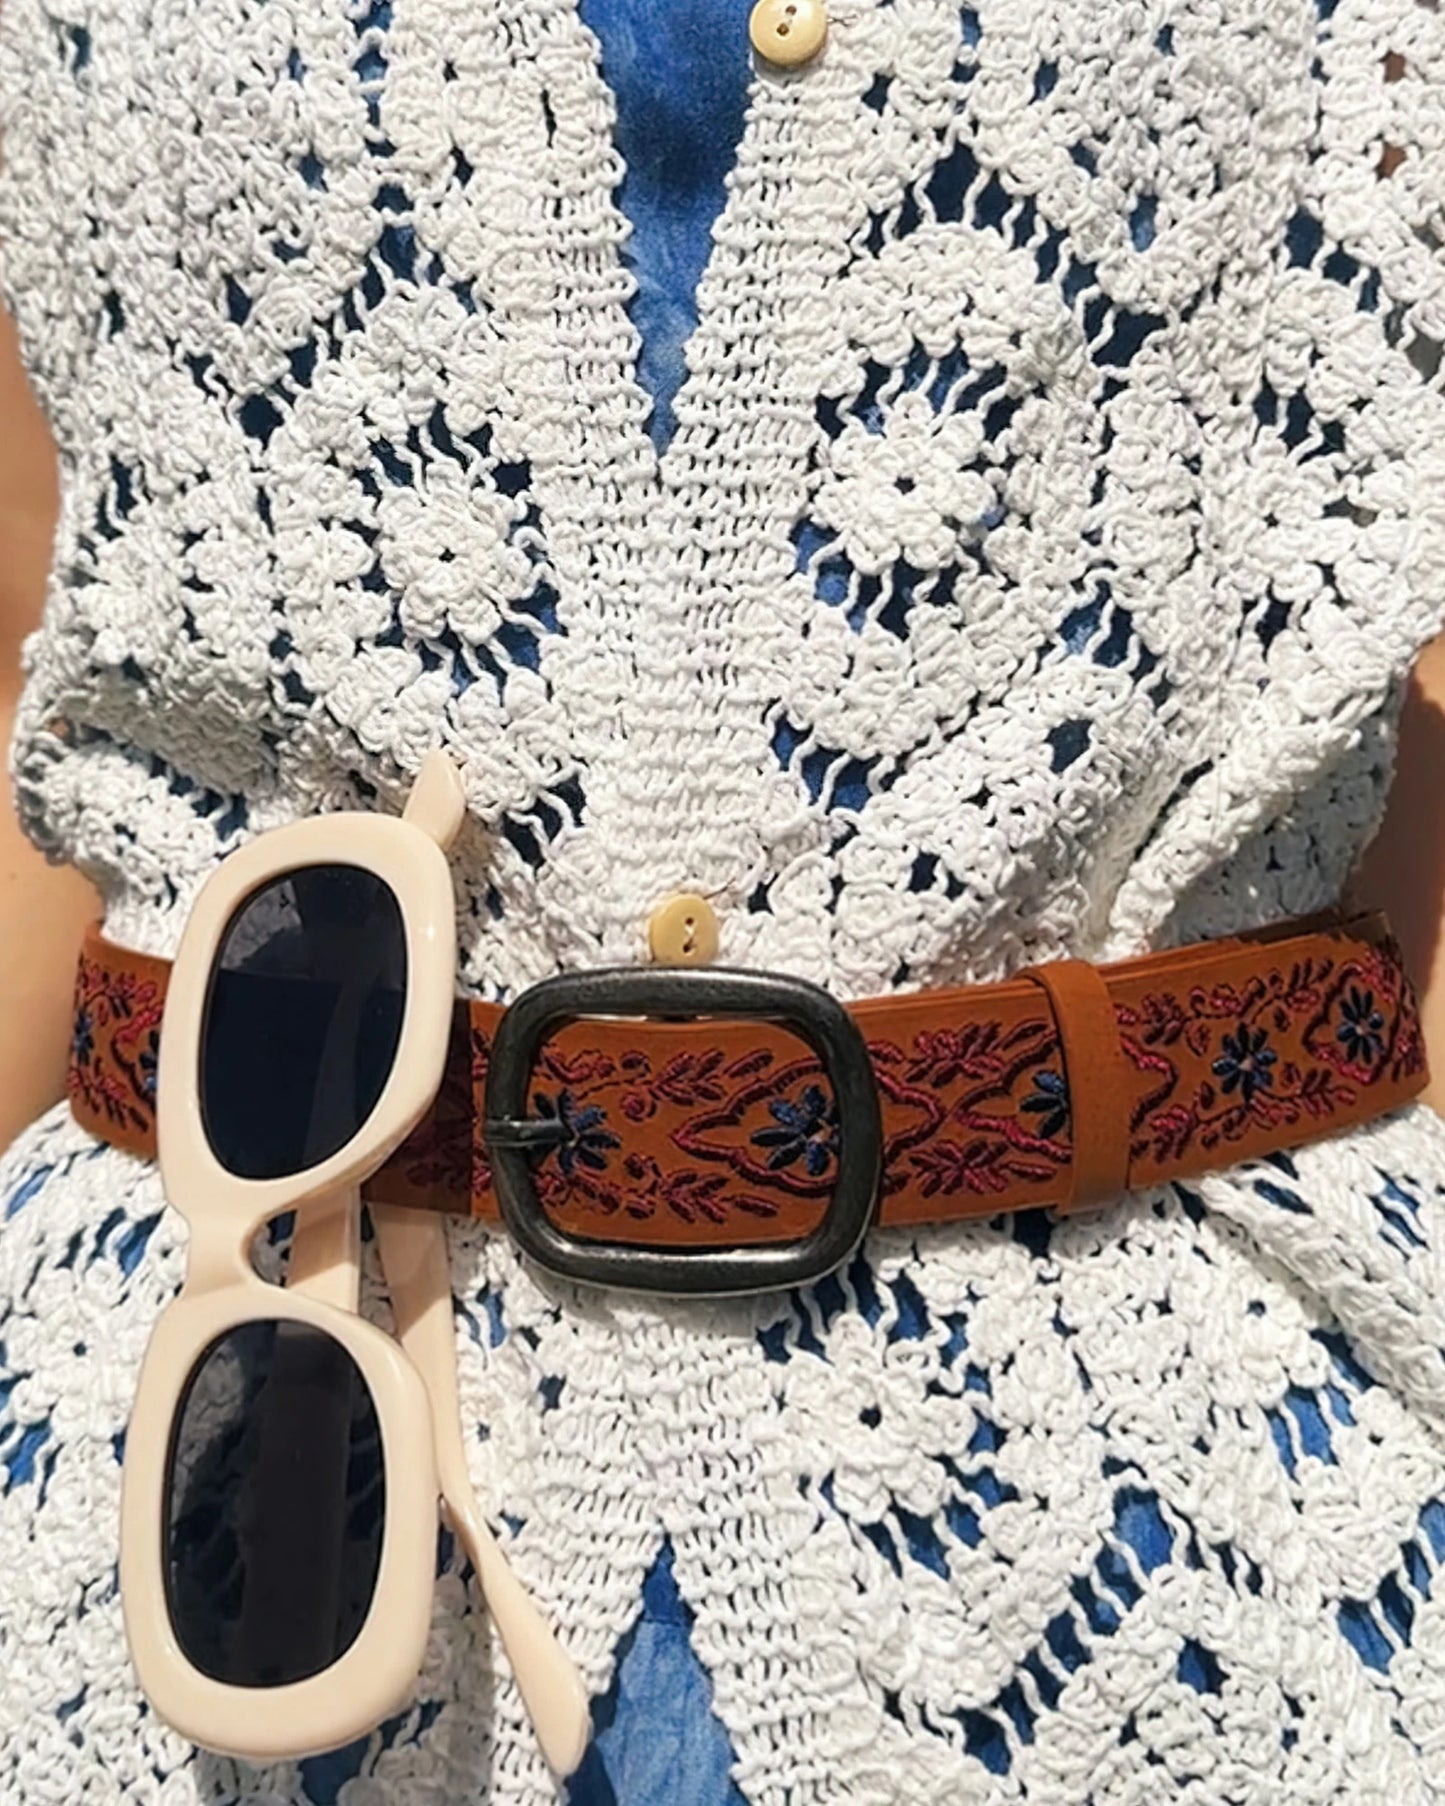
Buy Model’s Look
Installation Guide
Installation Guide
![]()
🛠️ Motorcycle Dash Cam Installation Guide (Front & Rear Cameras)
📍Step 1: Connect the Power Cable
Access the Battery
The power source for most motorcycles have the battery. First, unscrew both side panels and remove the battery cover to locate the battery.
Check the Voltage
Set a multimeter to 20V DC. Connect the black (negative) probe to the battery’s negative terminal. Use a test light to check each fuse—you're looking for a 12V ACC (Accessory) fuse.
Connect the Ground Wire
Loosen the screw on the battery’s negative terminal. Attach the ground (negative) wire from the main unit and tighten it securely.
Tap into the ACC Fuse
Remove the identified 12V ACC fuse and connect the power cable to it using a fuse tap. This completes the power connection.
Power On the Main Unit
Plug in the dash cam main unit and confirm that it powers on properly.
📍Step 2: Route the Cables
Pull the power cable from the battery compartment and route it underneath the fuel tank.
Secure the cable along the way using zip ties or clips.
Bring the cable out near the front of the bike for camera connection.
📍Step 3: Install the Front and Rear Cameras
Install the Front Camera
Apply the included 3M adhesive to the base of the front camera.
Mount the camera to your desired position at the front of the bike.
Press firmly to ensure the adhesive sticks well.
Route the camera cable neatly along the front frame and secure it.
Install the Rear Camera
Repeat the same steps using 3M adhesive to mount the rear camera.
Route the cable internally through the frame toward the battery area, similar to how the power cable was routed.
Mount the Main Unit
Use the provided mounting bracket or ball rod to install the main unit next to the handlebar or armrest area.
Tighten the bracket using a wrench to ensure it’s firmly secured.
Connect Camera Cables
The main unit ports are typically labeled “F” for Front and “R” for Rear.
Plug the front and rear camera cables into their corresponding ports.
From ldea to Success
From ldea to Success
we don't stop there; continuous optimization and wireless updates set us apart.
Your opinions matter – share your thoughts on features and stability. Join our collaborative journey, where your ideas shape an extraordinary product. Be more than a backer; become a vital part of our community!

2017 年に設立された当社のビジョンは、繊細さと強さの両方を体現するバッグを作ることです。当社は最高級の素材のみを使用することに注力しており、細部に至るまで当社の実用的なアプローチを反映しています。このペースの速い世界で、当社は完璧な職人技と優雅さが共存する製品を作ることに専心し続けています。ミニマリストとモダニズムの原則からインスピレーションを得て、伝統と革新の完璧なバランスを追求し、きれいなラインと洗練された輪郭を持つ時代を超越したシルエットをデザインしています。
あなたの旅のお手伝いをします
当社のコレクションは、優れた美的感覚とデザインに対する独自の視点を持つ熱心なチームによって作られています。主に女性用ハンドバッグを専門とする当社は、洗練されながらも微妙にレトロなニッチに焦点を当て、実用的でスタイリッシュ、そして特徴的なモダンなバッグをお客様に提供することを目指しています。革製品業界で9年目を迎えた当社は、私たちを導き続ける情熱に突き動かされ、独立した製造施設に誇りを持ち、最高級の製品のみを製造するという確固たる決意を貫いています。
SHIPPING & RENTURN
SHIPPING & RENTURN
Your shipping method can be selected atcheckout. Costs will be calculated prior topayment and will vary by order depending on anumber of factors,including but not limited to:item count, package weight, delivery ZlP code.and selected shipping method.
Free shipping on orders over $99
Return:
We are working to ensure you will have the highest quality product we can offer! We will accept returns and exchanges of items in new and unuse dcondition with in 30 days of receipt with valid proof of purchase.
 Tie-dye patterns are created through variations in tension during the binding process, causing dyes to soak the fabric unevenly.
This results in rich, layered colors and soft, organic textures.
With skilled techniques, each piece becomes vibrant, detailed, and naturally artistic—offering a charm and cultural depth that modern prints can’t replicate.


HEAVEN-SENT FAVORITES
-
Futuristic
通常価格 $59.90 USD通常価格単価 あたり -
BEN Sunglasses
通常価格 $59.00 USD通常価格単価 あたり


